How to Install FREE SAP System – Part 2

!!! LATEST UPDATE November 2018 – The newest step guide on how to install SAP software – STARTS HERE!
The latest guide on how to download SAP software can be found here.
Guide for downloading SAP software in this article is already OBSOLETE!
Do you want to start learning ABAP? You definitely need a learning SAP software.
In this article you find, how to continue with answering your question “How to install Free SAP System“.

ABAP Academy – How to Install SAP on Your Own Machine
Download and Setup Java Runtime Environment
SAP needs JRE to run properly. To download the newest version, type in „download java se runtime environment“ to a search engine. You get to the site a similar site to this one:
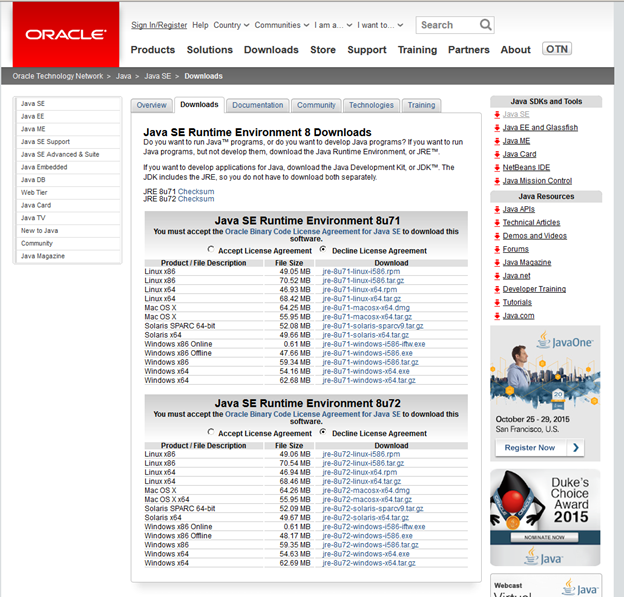
Choose the most current Windows x64.exe file, download it and install on your PC.
Start SAP Application Server Installation Process
Make sure that you run installation process under user with administrator privileges.
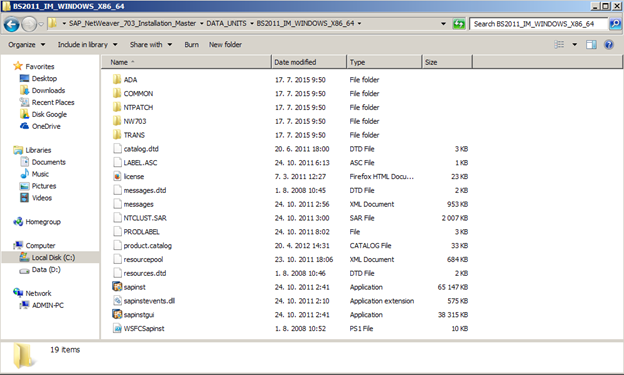
Unpack downloaded file: „ABAP_7_03_SP04_64_bit_Trial_3_9_2_GB.rar“ and run following .exe file: “\NWABAPTRIAL70304_64\SAP_NetWeaver_703_Installation_Master\DATA_UNITS\BS2011_IM_WINDOWS_X86_64\sapinst.exe”
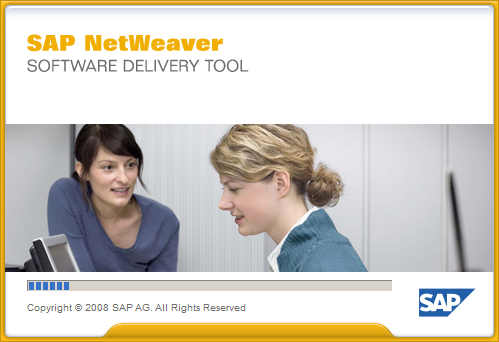
Installation process starts.
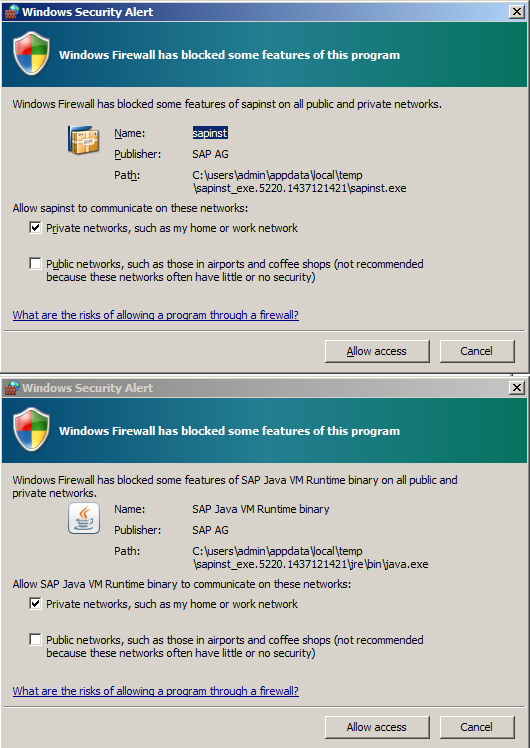
Allow access through your firewall for “sapinst” and “SAP Java VM Runtime binary”.
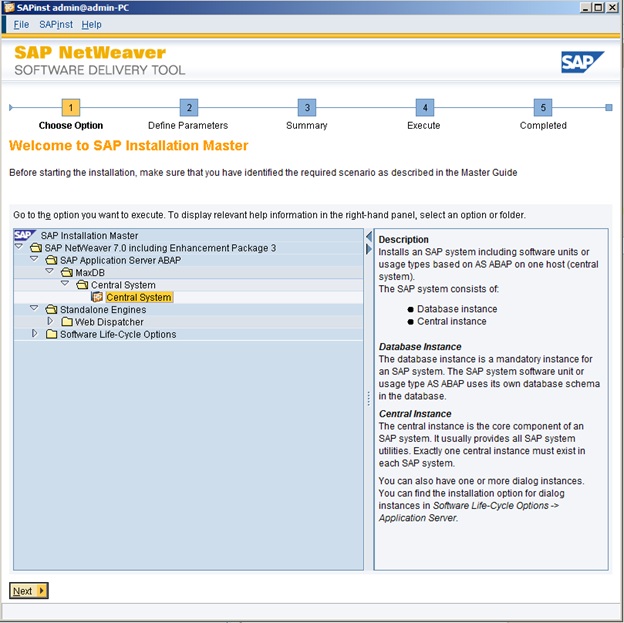
Installation Process: Choose Option
First screen of installation wizard comes up.
In the installation window choose “SAP Application Server ABAP->MaxDB->Central System” and click “Next”. By selecting this option, you choose to install MaxDB database system and ABAP application server on your machine.
After few seconds, popup window comes up, which informs you, that you will be logged off from the system. This is necessary to proceed to continue in installation process.
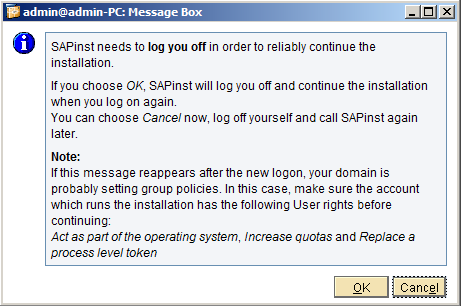
If you click “OK”, you will be logged of and after logging back into the system, command line window with the following information should appear and you are going to be able to continue with the installation right away.

If it is not your case and you don’t see any command line window after you log in, you should run installation process once more and if you get to the same installation phase, choose “Continue with the old option”
Installation Process: Define Parameters
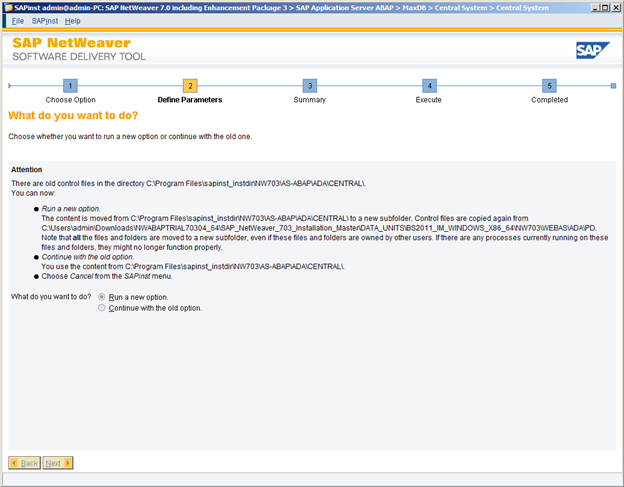
You can also choose to log off by yourself later on. You can also continue with the installation even after restarting your computer. You just need to run installation file once more.
In such case, you will have to repeat the same installation process and you will get to the following point, where you will be prompted to choose running installation either from new or old option. Choose “Continue with the old option”, to be able to continue with our installation.
Accept the License Agreement and click „Next“.

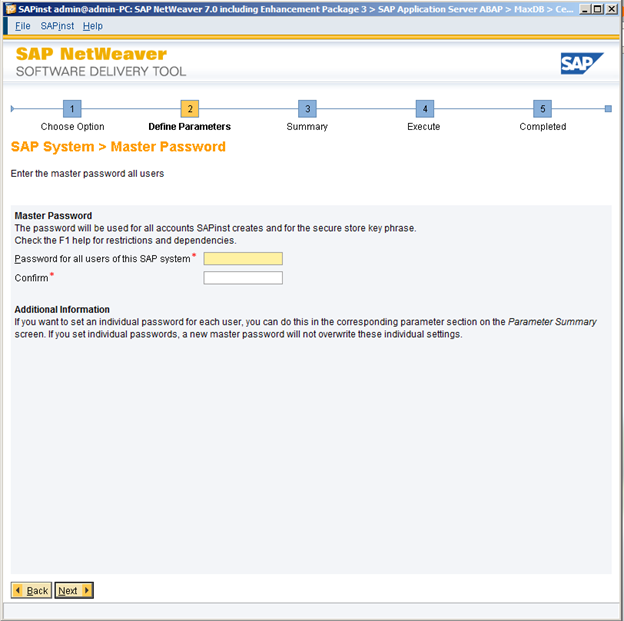
Set your master password for all technical users and click “Next”.
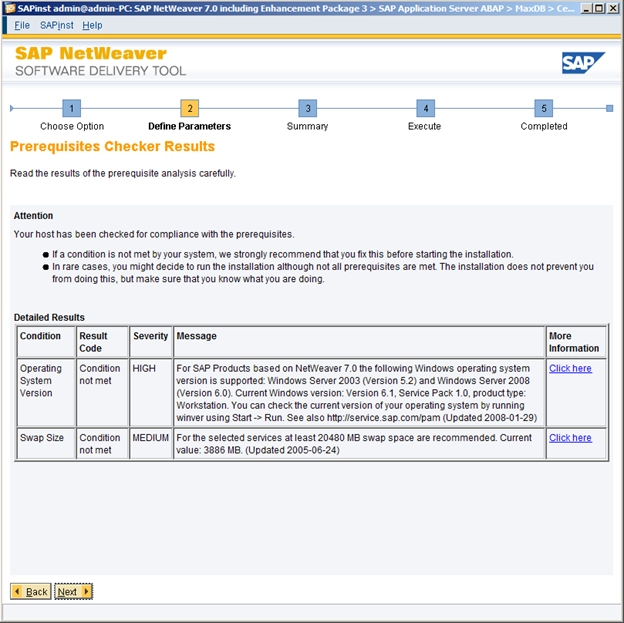
Then installation checks your system and all the prerequisites, which need to be met to be able to continue. If any problem is found, you might see the following window.
Just click on “Yes” to see what prerequisites your system does not meet.

Following screenshot is from our installation process. It contains all conditions, which are not met with our OS.
If you will have to do some changes to your OS, stop the installation “File->Exit”. Do the necessary changes. Restart computer if needed. Run sapinst.exe again and continue installation from the point where you stopped by choosing “Continue with the old option” in window that will come up.
In my case, I had to increase swap size to 20480 MB (here is how you do it on Windows 7: http://windows.microsoft.com/en-us/windows/change-virtual-memory-size#1TC=windows-7). It is not required to meet all of the requirements to continue with the installation. I left the “Operating System Version” issue unresolved.
Hit “Next” and if popup window comes up again, click „Yes“ to continue with installation process.
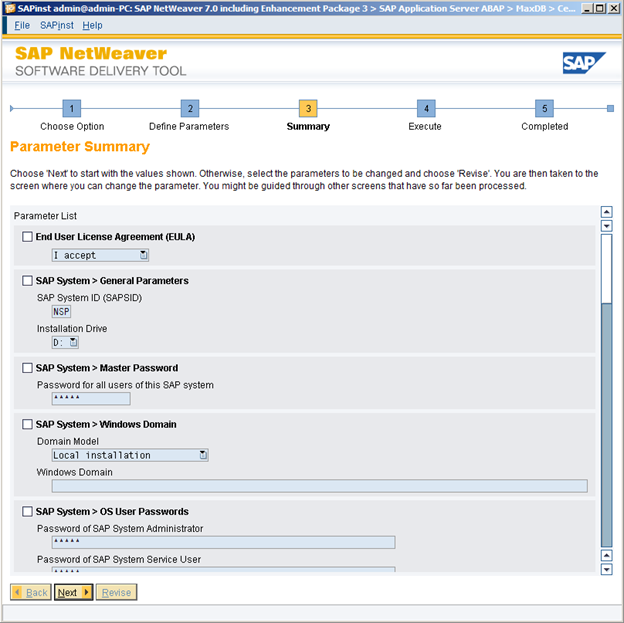
Installation Process: Summary
Parameter Summary screen comes up. You can go through the list to check if you want to change some values. If so, feel free, otherwise you can continue without any changes.
People do most changes for System ID, which is the name of your system and change passwords.
Notice: in this state, in some cases installation may not proceed further. Most often, the problem is that you don’t have enough of space on your hard drive.
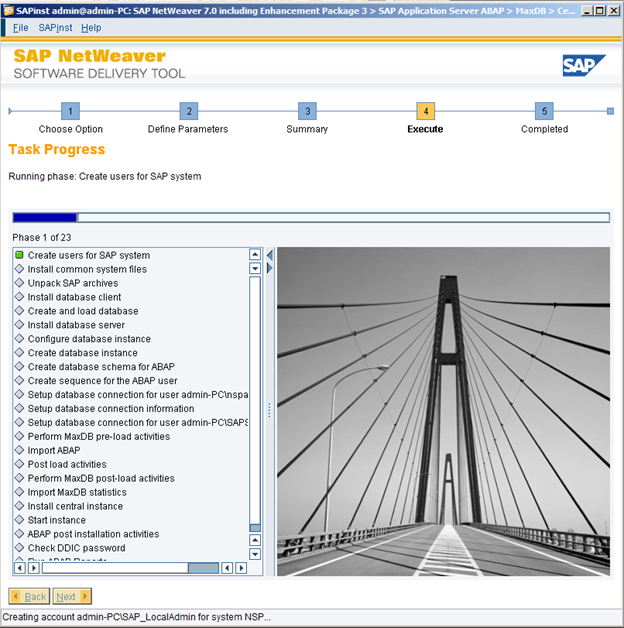
Installation Process: Execute
Perfect, installation finally starts and lets hope that you are going to make it for the first time without any problem ;). Unfortunately, this is probably not going to happen, but lets be optimistic.
The longest part is “Import ABAP”. This can take about an hour. Depends on your system.
Installation Process: Troubleshooting
Mostly in this part you start to get into troubles. If this is your case, please refer to the eBook, which you can download after sharing this post.
[sociallocker id=”1018″] >> Download Complete Instructions on How to Install SAP Trial System HERE << [/sociallocker]
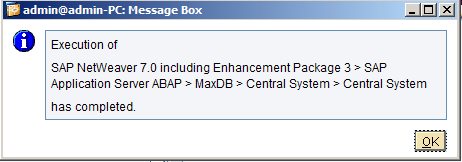
Installation Process: Completed
And this is what we were waiting for. Congratulations! Server installation was the longest and hardest part.
What are the next steps?
In the next article we will continue with next steps of installation process. Or you can download it now, by sharing this post:
[sociallocker id=”1018″] >> Download Complete Instructions on How to Install SAP Trial System HERE << [/sociallocker]
Upcoming installation steps:
- DONE – Download SAP Netweaver Trial System
- DONE – Download and Setup Java Runtime Environment
- DONE – Start SAP Application Server Installation Process
- Installation Process: Choose Correct Options
- Installation Process: Define Parameters
- Installation Process: Take a Look at Summary of Setup
- Installation Process: Execute
- Installation Process: Completed
- Install SAP GUI
- Start and Stop Server
- Setup Learning System
- Log In to System
- Get help if you get into troubles – Troubleshooting
 What is & How to Create Function Module in ABAP?
What is Function Module? Notice: In this article, I will be using…
 How to Change SAP Easy Access Screen Picture?
How to change SAP Easy Access Screen Picture Step By Step as…