How to Create a Database Table?
In this article, we are going to create a table to store records about cars step-by-step from scratch.
Here is the information about cars that we are going to use in the table:
- Car ID
- Model: a model of a car such as Sedan, Hybrid, Hatchback, etc.
- Store: to which store the car belongs to
- Price
- Currency
The table below contains the details of the table that we are going to create.

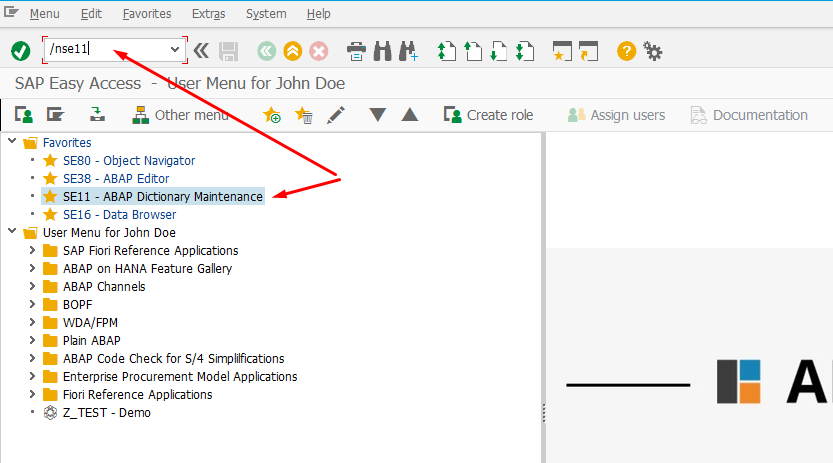
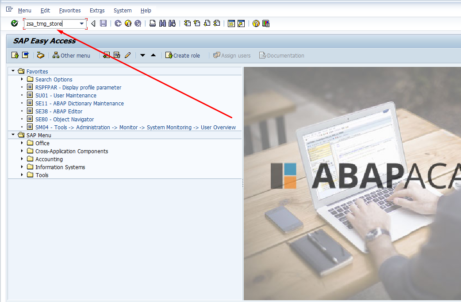
Let’s start with creating the table. From SAP Easy Access, open transaction SE11 ( ABAP Dictionary ).
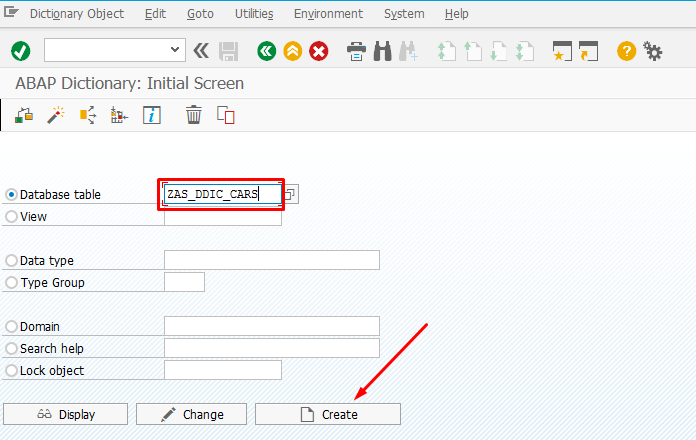
Once you get to “ABAP Dictionary” transaction,
.. make sure you have selected “Database Table” radio button and fill in the database table name.
In our case, we will use “ZAS_DDIC_CARS”.
Notice: What “ZAS” means? Each customer table name must start with Z or Y. In ABAP Academy, we add an initial name right after Z or Y. AS are my initials.
Click the “Create” button.
Delivery and Maintenance
In very next window, you’ll be redirected to is the “Delivery and Maintenance”.
- Fill in “Short Description” for the new table.
- For “Delivery Class” choose “A” which stands for “Application table”
- In “Data Browser / Table View Editing” drop-down list choose “Display/Maintenance Allowed”. This will help you to maintain data in database table manually
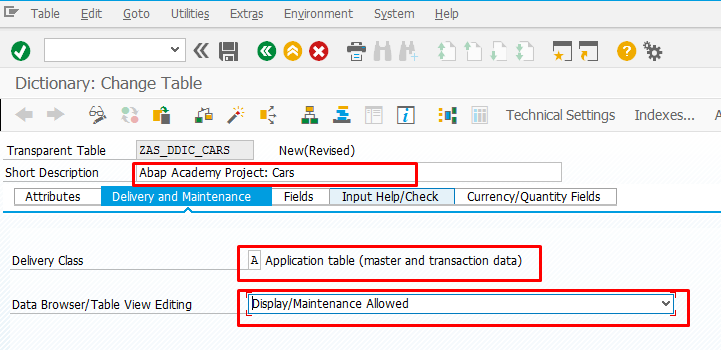
Notice: Use option “Display/Maintenance Allowed” so that you can test your architecture easily. Otherwise, use “Display/Maintenance Allowed with Restriction” anytime you can. This option allows you to view data in the table but not edit. This is the standard option for delivering tables to production.
Database Fields
Quick Version for Prototyping Purposes
If you are doing the prototyping, you want to create and maintain the changes in the whole database table as quick as possible in order to prove your concept.
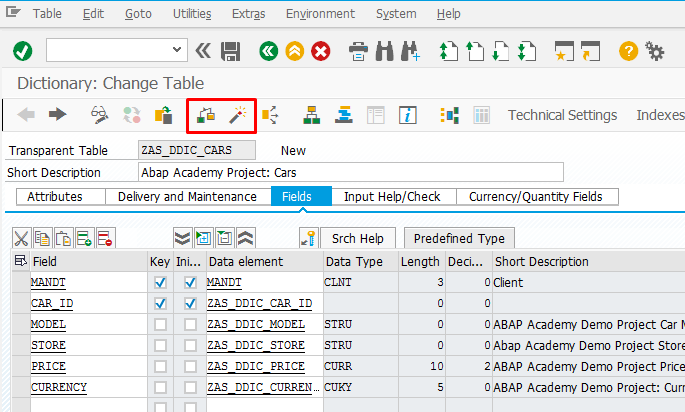
Go to the “Fields” tab and click “Predefined Type” tab.
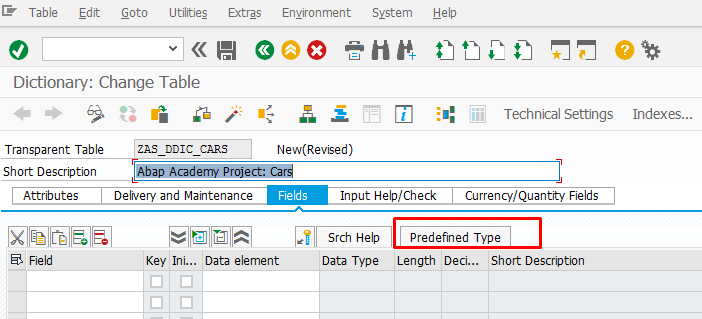
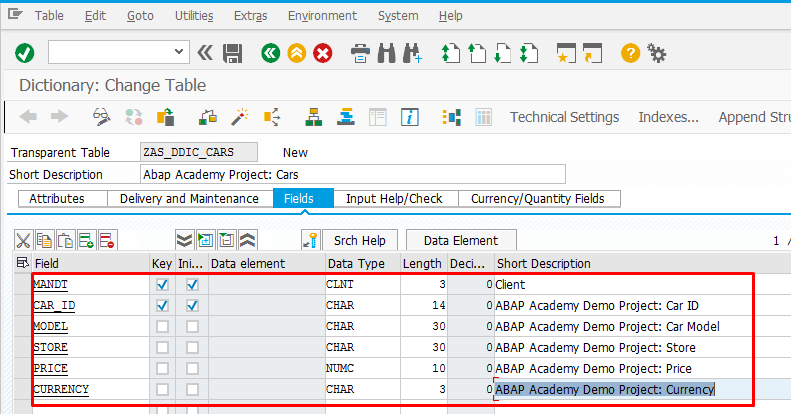
Create all fields and fill in the Data Type, Length, and a Short Description of each field.
Besides all the fields (ID, Model, Store, Price, and Currency), we add a special field called “MANDT”. This is client field and is required by SAP. Each client has a different right to see the data. This client field must be defined at the beginning of the table definition + be defined as the key with an initial value.
The primary key(s) of the table defined by ticking the checkbox in the “Key” column. For the key field, we must also tick the “Initial Value” column, which means that the field can not be empty.
Long Version for Production
In the long version of creating fields, we create complete technical information of all the fields. You need to define the type of the fields by creating Data Elements and possibly Domains.
Note: If you want to know more about Data Element and Domain, you can go to this link: Data Element vs Domain
This approach is important when delivering a database table to production or other environments in the landscape.
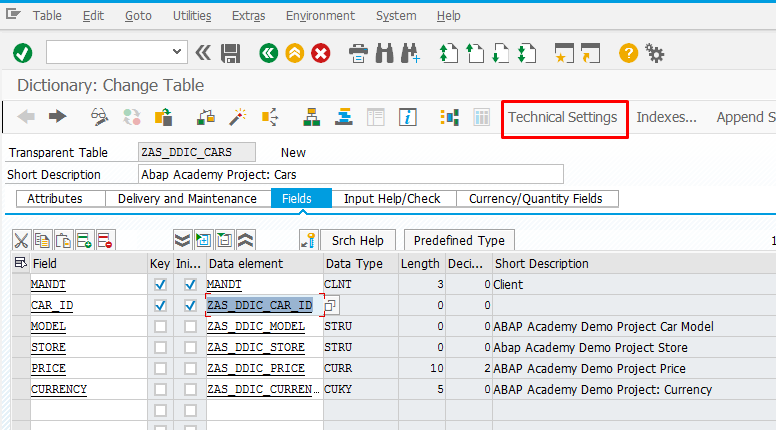
Go to the “Fields” tab to create all fields and data elements, also define the primary key.
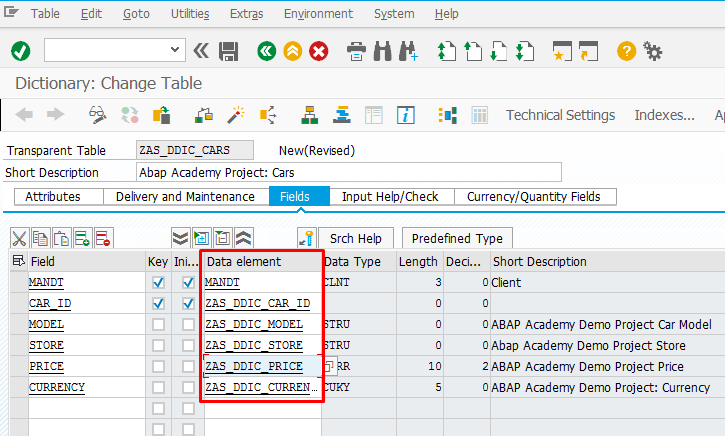
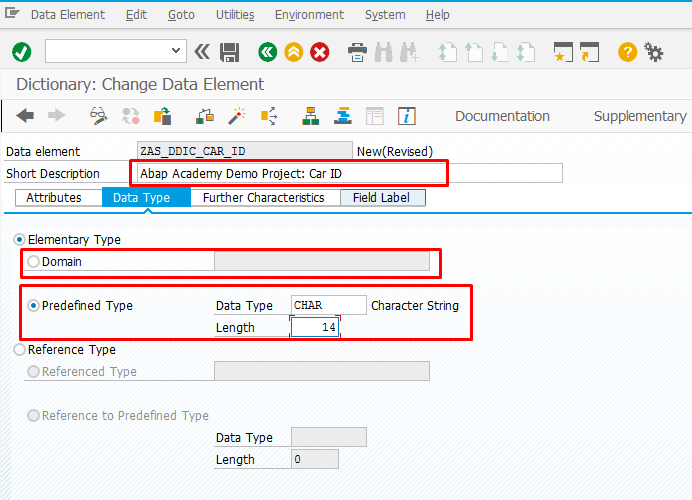
Double click on the data element name to define the technical detail of each data element.
Fill in “Short Description” and define the data type, whether to use Domain or Predefined Type.
Notice: For the MANDT field, use the domain with the same name with its data element, which is “MANDT”. This domain is ready to use as it is created by SAP already.
When we display data in an application, we want to present them to the users in an understandable name. For this, we need to create labels for each field. Go to “Field Label” tab and fill in all labels, the short, medium, and long labels.
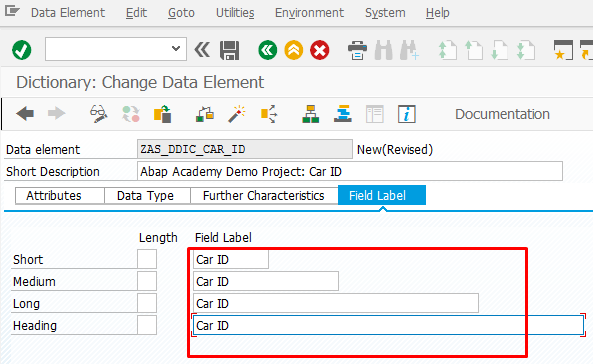
Do the steps above for each data element.
Technical Settings
Once database definition is created, we need to tell SAP what technical settings this database table will contain physically on the database level.
Click the “Technical Settings” button.
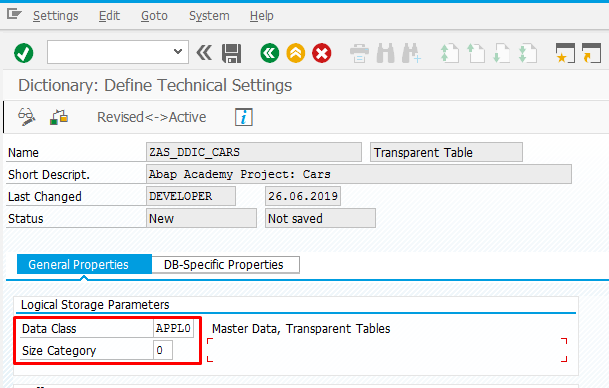
.. and choose “Data Class” and “Size Category” from search help.
- Learn more: What is Data Class and how to set it up? Click here…
- Learn more: What is Size Category and how to set it up? Click here…
In this case, we choose “Data Class” APPL0, which is Master Data.
As for “Size Category”, we choose 0, which is sufficient for prototyping.
The final step is to check the consistency (CTRL+F2) and activate it (CRTL+F3).
And the database table is created!
Leave us Your Comment
- Was this article useful to you? Let us know…
- Do you have any additional questions? Ask us…
All here in comments. We’re here to help you out move your career forward with ABAP ;).
 What is & How to Create Function Module in ABAP?
What is Function Module? Notice: In this article, I will be using…
 How to Change SAP Easy Access Screen Picture?
How to change SAP Easy Access Screen Picture Step By Step as…